Showing posts with label Recipe. Show all posts

2/14/2014

Friday's Treat ~ Red Velvet Cheesecake Brownie


I thought I would do something special for today since it is Valentines Day. My husband doesn't really care to deliver heart shaped anything to co-workers but this year I did it anyway! :) 


I don't think there is much to say about these. The pictures tell you everything you need to know! They are really, really good! So easy and cute!


I baked these on a sheet pan and then when they were completely cool cut them into strips just wide enough for the heart shaped cutter and place that on a cutting board. It was easier to do it that way then try to dig the cutter out of the pan. :)


We don't really celebrate Valentine's Day but I do try to make  { or bake } something special....just because. Not that I need an excuse but I feel better about eating something like this if it is for a "special" day!

Here is the recipe. Bake some today for someone you love. They will love you back:)

Happy Valentines Day!!!

Red Velvet Cheesecake Brownies

Brownies:
1 box red velvet cake mix
1/2 cup butter, melted
1 large egg
1 tablespoon water

Topping:
8 ounces cream cheese, softened
1 large egg
1/4 cup sugar
1/2 teaspoon vanilla extract

Directions

  1. Preheat oven to 350 degrees. Grease a 9x13 baking dish.
  2. Beat together the cake mix, butter, egg, and water until well combined. Dough will be very thick and sticky. Press the batter into the prepared pan.
  3. Beat together the cream cheese, egg, sugar, and vanilla until well combined. Drop by the spoonful onto the brownie dough.
  4. Bake brownies for 10 minutes and then remove from the oven and run a knife through the dough to swirl the cheesecake througout. Return to the oven and continue baking for 25 minutes or until set.
  5. Cool completely before cutting.
  6. Store in an airtight container in the refrigerator for up to 5 days.
 ~ recipe adapted from Food Fanatic

12/21/2012

Friday's Treat ~ Chocolate Crinkle Cookies

Chocolate Crinkle Cookies are definitely a Christmas favorite at our house. They are one of those cookies that I feel I can't make any other time of year....I don't know why that is actually...

I found the best recipe for them on the Williams-Sonoma website and you can find the recipe here.

The dough is very thick but very "fudge-y" as well....


form into balls, roll in powdered sugar.....


and 10 minutes later this is what you get. A perfect chocolate crinkle cookie!


Don't they look good?! Well, trust me. They are;)


What is your favorite holiday cookie?


Mary Elizabeth

11/28/2012

Beanilla

I've mentioned it before, but in case you didn't know, I LOVE vanilla beans. I use them as much as possible. I make my own vanilla, vanilla sugar, vanilla syrup, vanilla coffee creamer, vanilla ice cream and anything else that calls for vanilla. I have been ordering them online, because I can't find fresh beans here in Alaska. My little addiction was getting pricey. But I found a new site that sells vanilla beans. It's Beanilla. They have several other products. I was so excited when they arrived in the mail. They are by far the freshest beans I have ever used. They were oily, and very flexible. Comparing these to the ones I had been getting, the old ones were extremely dried out. I think there prices are very reasonable also, especially for the quality of the beans.

Sorry this post doesn't have any pictures, but we have used up all storage space for pictures here on blogger. I am working on finding a fix for this.

Hope everyone had a wonderful Thanksgiving.

Christine

10/16/2012

Meatball Sandwiches


We love meatball sandwiches at our house. To have the best meatball sandwich you need to make the sauce and meatballs. This is the recipe that I use to make our meatballs.

Homemade Meatballs

1 pound of ground beef
2 slices of bread
2 cloves of garlic
fresh parsley, chopped
1/4 cup parmesan cheese

2 tablespoons of milk
1 egg
salt & pepper
 

 In the food processor (or you can do it by hand) : Tear up the bread into cubes. In the food processor, put garlic & parsley. Pulse until both are finely chopped. Add parmesan cheese cut into 1-inch cubes (if not already grated). Pulse until fine. Add bread in small batches and pulse. Add mixture to ground beef. Add eggs, milk, salt and pepper then mix with a fork, keeping the mixture light and fluffy. Make the balls into your desired size. Bake at 350 just till they are browned. Add to your sauce.


I usually let the meatballs cook in the sauce for at least 1/2 an hour (longer if you have the time). When the sauce and meatballs are almost done I make the bread. Smash a clove of garlic and spread over your bread. Sprinkle with italian seasoning, parmesan cheese, salt, pepper. Drizzle a little olive oil, and then top with provolone cheese. Place in the oven until the cheese is melted and the bread is lightly browned.
 
Top with the meatballs and a some sauce. I usually serve them chips and a salad.
 
 
Enjoy!!
 
Christine


9/30/2012

Apple Pie

Here in Alaska we seem to have skipped fall this year and headed right into winter. We woke up yesterday to about two inches of snow in our yard. Thankfully, most of it has melted though. Nevertheless, I refuse to go straight to winter. So, last night I made my quick version of an apple pie.


This is so easy. I use a pie crust recipe that has been in our family for at least five generations (that I know of). Roll it out. Fill with sliced apples (you could use any fruit). Put about 8 slices of butter, sprinkle with apple pie seasoning. Let this bake for 35 - 45 minutes (depends on the thickness of the apple slices. When its done, transfer to your serving dish. Drizzle with homemade caramel sauce Serve warm. Homemade ice cream would also be great with this.


My taste testers PATIENTLY waiting to do their job.
 
Christine

9/14/2012

Friday's Treat ~ Butterfinger Cake


This cake has so many names and so many versions its unbelievable, really. It seems every one had their own version so, I decided to make my own version well:) 


I started with a basic cake layer. Then as soon as you take it out poke some holes all over and then pour a layer of caramel over top. Let that sit until cool. I sprinkled some butterfingers on top of the caramel as well. 


I didn't take pictures of every step because I kept getting sidetracked by this little cutie that was crawling all over the place. I was leaving the kitchen every 2 seconds looking at what she was getting into:) 


If she was in the kitchen she was playing under the sink....haha...my "things" are the best toys apparently. Pans and utensils are her a few of her favorite things:) There is no stopping her now that she can open the cabinets. She is sooo much fun and she was certainly enjoying her self!!


So here is the finished cake. Once it is cool spread a layer of cool whip and then sprinkle with butterfingers. This is really good and very moist.....Now most recipes that I saw said to use a yellow cake mix. I made my own ( recipe follows ). If I was going to be serving this at home I would use real whip cream instead of cool whip and would bake it in a 13*9 pan instead of the baking sheet but this works really well for the office or for party's!


Can you see the caramel sinking into the cake? Sooo good!

This cake recipe comes from the cookbook I told you about here. It really is a no fail cake. So delicious and moist.

Classic American Layer Cake

1 cup unsalted butter. softened
2 cups sugar
3 large eggs
2 1/2 tsp vanilla
3 cups flour
4 tsp baking powder
1/4 tsp salt
1 12/ cups milk, warmed

Cream butter and sugar. Add eggs and vanilla. Add the dry ingredients and then as that mixes in slowly pour in the warm milk and mix until everything is combined. Spoon into prepared pans. 
If you use this as the traditional layer cake use two 9in pans and bake at 350 for about 35 minutes. 
If you use this as the sheet cake above I used a large baking sheet and baked it at 350 for about 20 minutes, until slightly golden brown on top. 

I also made my own caramel:) Use a can of sweetened condensed milk and pour into a double boiler and let cook for about 45 minutes or so stirring frequently. 

6/11/2012

Pizza!

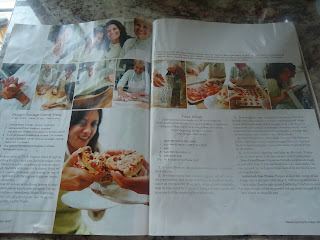
Growing up we made pizza all the time. Now that means the dough and sauce were made from scratch. My Mom would have had us make the cheese too, except we didn't have cows. So, that was bought. We used several different recipes over the years. But, I think the one I am about to share is the best one I've used. I bought this magazine a couple years ago at an airport (can't remember where) flying back to Alaska from North Carolina. That was in the stress free flying days when I could take a book or magazine and read it while flying though the air. These days, not so much. The whole time is spent telling the kids not to kick the seat in front of them, and PLEASE for the hundred time quick touching everything, it's nasty. I was informed though that if it doesn't look nasty it's okay. It has to look nasty to be nasty. So, to my boys germs aren't nasty. Glad we settled that discussion.
Back to the pizza recipe, it comes from Simply Perfect Italian magazine. The article was so cute. This was a 100 year old family recipe that even now was requested at all family gatherings. This recipe calls for an egg which adds richness and several risings that result in a lighter, tastier crust. This really is the best crust recipe. It looks like a lot of steps, but it is really rather simple and so worth the little bit of effort involved.


Pizza Dough:

In a small bowl,  stir 1 package of yeast and 1 cup or warm water. Let it stand for 5 minutes.


In a large mixing bowl, combine 1 egg, 3 tablespoons of olive oil and 1/4 teaspoon of salt. Stir in the yeast mixture. Add 1 1/4 cup of flour. Beat with  an electric mixer on low speed for 30 seconds, scraping bowl constantly. Beat on high speed for 3 minutes. Using a wooden spoon, stir in as much of the remaining flour as you can (total flour is 3 1/2 to 4 cups).


Turn dough out onto a lightly floured surface. Knead in enough of the remaining flour to make a moderately stiff dough that is smooth and elastic (6-8 minutes). Lightly grease a large bowl; place dough in bowl and cover with a damp towel (make sure it doesn't touch the dough). Let it rise for 30 minutes.


Punch dough down. Turn dough out onto a lightly floured surface. Roll into the shape of the pan you are using. Place onto the grease pan. Cover with damp towel and let rise for 20 minutes.

Spread oregano over the dough, then sauce. Sprinkle with mozzarella cheese. Break off small chunks of sausage and arrange on top of the cheese. Sprinkle with parmigiano-reggiano cheese. Drizzle olive oil over the top.

Bake for 30 minutes or until crust  bottom is crisp and brown. Cool for 5 minutes.

Let me know if you make this and how you like it.


Rhiannon loves it, but prefers it on the table not on the plate.


Christine

6/08/2012

Friday's Treat


Peanut Butter Chocolate Chip Cookies were on the list for this week's treat. I love these cookies. Of course anything with peanut butter and chocolate is awesome! I found the recipe for these on Smitten Kitchen. They are very yummy;) As she says on her website she found the recipe for these in the Magnolia Bakery cookbook ( a popular bakery in New York City ). 


These come together so easily that I actually mixed them up by hand. Yep, that's right....by hand! Mix them up and scoop them out ( I used a large cookie scoop for this or you could use an ice cream scoop as well ).


Roll them in a little bit of sugar and then place on your baking sheet.


I pressed them down with a fork, which is traditional for peanut butter cookies and then bake


These are large. If you wanted a smaller cookie just use a smaller scoop or spoon.

Have a great weekend and enjoy!!

Mary Elizabeth


6/07/2012

Garlic-Slathered Stretch Bread

A few years ago I randomly got a cookbook in the mail. Not sure how it came about that I received it. I didn't order it and had never heard of it before, A Passion for Baking.  I don't usually use cookbooks ( Google is my cookbook! ) so I wasn't terribly excited about it until I started to look through it......BEST. COOKBOOK.EVER!!!


I have found some of the greatest baking recipes in this book. Everything from this garlic bread to amazing cookies and cakes of every kind. It also gives tips and tricks on the best way to mix, bake and store everything that's in it as well.

So, the Garlic Slathered Stretch Bread. This is pretty simple to make and is absolutely amazing.


The dough is light and fluffy.


The topping is not too strong and just melts into the bread.


Combine the two and then top it with plenty of mozzarella cheese.


And this is what you get at the end. Cut it into strips and enjoy!!! I usually make this with pasta or soup and sometimes we just eat this!

Garlic-Slathered Stretch Bread Recipe

Dough
2 cups warm water
1 3/4 tsp rapid rise yeast ( I have used regular yeast and that works just fine )
1 3/4 tsp salt
4 tsp sugar
4 cups flour

Whisk yeast and water together and let stand about 3 minutes. Add salt, sugar and most of the flour to make a soft dough. Knead for about 8 minutes, adding more flour if necessary. Let rise 1 1/2 to 3 hours. Turn dough onto floured surface and gently deflate. Let rest while you make the topping.

Garlic-Slather Topping
6 cloves garlic, finely minced
1/2 tsp salt
2/3 cup mayonnaise
1 cup grated parmesan cheese
1/2 tsp italian seasoning
1/3 cup olive oil
2 cups shredded mozzarella cheese

Mix everything but the mozzarella cheese together. Divide dough into half and stretch each half into a baking sheet. Spread half of filling onto each one and then top each one with 1 cup of mozzarella cheese ( I usually use more than that ).  Cover loosely and let rise another 1-1 1/2 hours. ( I have skipped this second rising when I was in a hurry and it turns out fine just not quite as light ). Bake at 400 for about 20-25 minutes until topping is brown and sizzling.

Enjoy!!

Mary Elizabeth


6/02/2012

Friday's Treat

This weeks treat....Lemon Bars and Strawberry Shortcake Bars. It has been very "summer-y" here the last few weeks ( FINALLY!!!! ) so I wanted to make something that was "summer-y" to go along with it. Lemon Bars are one of my husbands favorites so he was thrilled and the strawberry shortcake bars just happened because I had fresh strawberries in the fridge:) I am sorry to say i don't have a picture of either one. The Lemon
Bars were not done until late thursday evening, there was a bit of a scare with those. I thought I was going to have to make them over!! Turns out I just let them sit in the fridge for too long. So anyways, I didn't get the pictures thursday evening and I forgot to take them Friday morning so when I went to get the extras out of the fridge for the picture I found my husband had already eaten all of them;) Did I mention that Lemon Bars are one of his favorites? The recipe for the Lemon Bars will follow. I didn't have a recipe for the Strawberry Shortcake Bars. ( Christine, you should probably stop reading here....hahaha) I used a Butter Recipe Cake Mix....I know, I know! I am as shocked as you are that I used a cake mix!!!! Melted a stick of butter and mixed into the mix just so it would hold together and then pressed 2/3 of it into a brownie pan. I cooked the fresh strawberries with a little bit of sugar until it started to thicken and that over top of the cake mix. Sprinkled the rest of the mix on top and then baked it for about 25 minutes. After those were cool I drizzled some white icing ( powdered sugar and milk ) over top. Super easy and really good. You could also use jam/jelly in these as well as any kind of fruit. I had about 2 qrts of Strawberries and used about 1/2 cup of sugar when cooking them. I got to thinking afterwards that you could also use the crust of the Lemon Bars as well for these.

Lemon Bars

Crust:
1/2 cup Butter
1/4 cup Powdered Sugar
1 cup Flour
1/8 tsp Salt

Beat butter and sugar until light and fluffy. Add flour and salt and mix just until holding together. Press into an 8*8 pan and bake at 350 for about 12 minutes.

Topping/Filling
1 cup Sugar
2 Eggs
1/3 cup Fresh Lemon Juice
1 tablespoon Lemon Zest
2 tablespoons Flour

Beat sugar and eggs until smooth. Add the rest of the ingredients and then pour over crust. Bake at 350 for 18-20 minutes.

Dust with powdered sugar after they are cool

Enjoy


P.S. I can't wait to show you what I found at an Estate sale I went to today....so excited:)

Hope ya'll have a great weekend!!

Mary Elizabeth


3/10/2012

Recipe for Fridays Treat


Oh-So-Coconutty Cupcakes

I have to start by telling you to use the coconut milk. I haven't in the past but am so glad I did this time. It made a huge difference in the cupcake....much more coconut flavor!

Cupcakes:

1 1/2 C Sugar
3/4 C Butter
3 Large Eggs
2 Tsp Vanilla
1 Tsp Coconut Extract
1/4 Tsp Almond Extract ( I didn't use this )
2 1/2 C Flour
2 Tsp. Baking Powder
1/4 Tsp Baking Soda
1/2 Tsp Salt
3/4 C Coconut Milk ( if you use the milk in the can it is recommended to chill it overnight )
1/2 C Shredded Coconut

Cream Butter and Sugar. Add Eggs and Extracts. Fold in dry ingredients and then add the chilled Coconut Milk. Fold in Coconut. Place in cupcake pan and bake at 350. The recipe recommends 30-35 min. but I only baked mine for about 25 min...If I had left them in the whole 30 min they would have been to dry I think and almost burned.

Coconut Frosting:

1/2 C Butter
3-4 C Confectioners Sugar
A little bit of Coconut Milk ( 3-6 Tbls ) or as much as needed.
1 Tsp Vanilla
1 Tsp Coconut Extract
1/4 Tsp Almond Extract ( I didn't use this in the frosting either )

Beat butter and sugar until creamy and then add the milk as needed. The book says you can add food coloring if desired but frosting is such a pretty white when done that I think it would ruin it to color the frosting.

Frost cooled cupcakes and top with shredded coconut.....then sit down and ENJOY!!

Hope you make them, they are well worth it:)


Mary Elizabeth

3/19/2011

Giant Cupcakes are SOOO Cute

Okay here is another giant cupcake that I made Monday night.  I LOVED this one too. The girl I made if for wanted to incorporate a bear and small animals. I made sugar cookies and found some small animal cookie cutters. I love making these. I used one of my favorite chocolate cake recipes. Look here for the recipe.


I am making dinner for a friend from church today. She had her baby last week. I have a couple of ideas that will put a new twist on some old favorite foods. I am also working on my son's room and that is almost finished. Also, working on the stencil above the fireplace. So, I will have a few posts coming in the next couple of days.


Hope you all great weekend.
Christine

3/06/2011

Sour Cream Rolls

If you want an quick, easy roll recipe, you need to try this recipe. I've been making these for a couple of years now. They always turn out the same, light and fluffy. They are great with a bowl of soup or a great addition to a roast and mashed potatoes. 

Sour Cream Rolls
 They make about a dozen.

2 1/2 to 3 cups flour
2 tablespoons sugar
1 tablespoon yeast
1 teaspoon salt
1 cup sour cream
1/4 cup water
3 tablespoons butter
1 egg

In your mixing bowl, combine 1 1/2 cups four, sugar, yeast and salt. In a small saucepan, heat the sourcream, water and 2 tablespoon butter to 120-130 degrees (slight simmer); add to the dry ingredients. Beat on medium speed for about 2 minutes. Add the egg, and 1/2 cup flour, beat for about 2 more minutes. Stir in enough remaining flour to form a soft dough.

Turn the dough onto a lightly floured counter, knead until smooth and elastic, about 8 mintues. Place the dough in a greased bowl. Cover and let rise till double in size. It's about an hour.
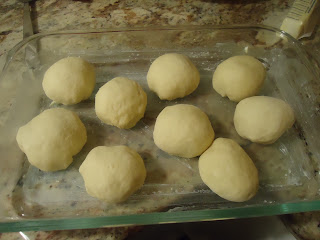
Punch the dough down and return to a lightly floured surface. Divide into 12 pieces. Form into balls and place in a lightly greased 13 x 9 pan. Cover and let rise until double in size again, about 30 mintues.


Bake at 375 degrees for about 25 minutes. Melt remaining butter and brush over the top of the rolls. Remove from pan and let cool.


Enjoy, Christine

2/21/2011

Shortbread Cookies

I love making these.  They are so easy and you can make them in any shape. I got this recipe from a lady I worked with at the airport here in Anchorage.

Peppermint Candy Shortbread

Beat 1 cup butter till creamy, add 1/3 cup sugar till. Beat till light and fluffy. Add 2 1/2 cup flour. Mix just till incorporated.

Divide into 3 balls. Pat the ball of dough out till about till it's about a 1/2 inch thick. Cut into triangles or into any shape you prefer.  Bake at 350 for about 20 - 25 minutes. Cool completely. While they are cooling, melt any flavor of chocolate. You can drizzle the chocolate, spread it half way or cover the whole cookie. Then sprinkle with crushed peppermint candies.

I used my ice cream cone and  sundae cookie cutters.


Enjoy, Christine

LinkWithin

Related Posts Plugin for WordPress, Blogger... Follow Me on Pinterest