6/30/2012

Blueberry Muffins

This has been a really long week for all of us. Mac had a infection around his eye and we spent Sunday though Thursday going to the doctors, getting lab work, and the eye doctor. Try leaving the house at 9:30 in the morning going to the doctors for another appointment, an hour and half later he sends you to the hospital to get lab work done. Two hours and fiftteen minutes later we were leaving. That was some speedy service let me tell you. We came home for half an hour to feed Jax and then back to the doctors to get the results. We there again for two hours in an examing room. The lab results were supposed to be rushed. They must not have gotten that memo. Oh, and by the way that was all with 4 kiddos. Needless to say by last night we were all drained.
So this morning the kids actually slept in for once on a Saturday. They usually only want to sleep in on Sunday, the one day that we have to get up. Jax doesn't sleep in though. He is always up by 6:30 no matter what is going on. I usually make pancakes or crepes, but today just didn't feel like it. I made blueberry muffins instead. I used the recipe on this blog. Which by the way you should check out. With a cup of coffee this made the perfect breakfast. And the best part, there were only a few dishes.


Rhiannon ate three.

Hope everyone has a great weekend.
Christine

6/29/2012

Friday's Treat

Red Velvet Mini Cupcakes with White Chocolate Cream Cheese Frosting


In honor of the Fourth this coming week I wanted to do something patriotic. I know I have made cupcakes the last few weeks but these little things are so good I didn't think anyone would mind:) and they are red:) I thought about making some blue frosting to go with the white but decided to just go with the sprinkles instead. I found the little striped liners at Michael's.
 On a side note, I think Michael's is my new favorite place to find cute and fun baking accessories!


I just love the sprinkles;)


My favorite Red Velvet recipe is from Bobby Flay, you can find the recipe here. It is really the best recipe I have found for Red Velvet....soo good!!


The frosting is one of my own.  I use 1 pkg cream cheese, 1/2 stick of butter, a full White Chocolate baking bar ( melted ), 1 tsp of Vanilla, I used a full 2lb bag of Powdered Sugar. Beat this all together and then at the end pour in just a little bit of heavy cream as you are mixing. Beat it on high until light and fluffy.

What are your plans for the 4th? 

Do you have any traditional desserts you make this time of year?

Have a great weekend

Mary Elizabeth


6/24/2012

Friday's Treat


I have sat down to write this post at least ten times in the last two days:) So, finally, here it is. Friday's Treat this week was "One Bowl Mocha Cream Cake" ( or cupcakes for my purposes ). This cake is soo good. Rich and moist. It is similar to a cake mix texture, but homemade so you know exactly what is in it! I made it into cupcakes of course so it would be easier to carry in and I don't think that it changed the taste or texture one bit by doing that. I didn't use the frosting that comes with the recipe because I wasn't sure how it would hold up for a longer period of time so still using the mocha I did something a little different. Another little secret to this recipe that makes it extremely moist and tender is to add a small box of chocolate fudge pudding mix.....while it's not necessary to get a tender and moist cake it is definitely a great addition that I promise you won't regret:)


The batter is very "fudge-y"...I don't know if that is a proper word but it should be:)


I use an ice cream scoop to fill my cupcake pans. It is the perfect size for them!


I made 2 different types of frosting. This one is more of a glaze than a frosting. I made some without the paper liners so it could fall down over the sides without making a mess of the papers.


This frosting was super easy. As you will see in the recipe below it only takes about a minute to make.


My husband came home with an empty tray which, like I have said before is what I aim for:)

Let me know if you make them and what you think! Hope ya'll are having a wonderful weekend!

Mary Elizabeth


One Bowl Mocha Cream Cake

2 cups Flour
1 cup Sugar
1 cup Brown Sugar ( I didn't use this. the 1 cup of sugar of plenty )
3/4 cup Cocoa
1 1/2 tsp Baking Soda
1 1/2 tsp Baking Powder
1/2 tsp Salt
1 cup Sour Cream
3 tbls Oil
1 cup brewed Coffee
2 tsp Vanilla

Mix everything together in a bowl until combined then pour into a 13x9 pan ( or 24 cupcakes ). Bake at 350. The cake takes about 30 minutes and the cupcakes take about 12-15 minutes. Do NOT overbake.

In the same bowl combine 1/4 cup boiling water, 1 tbls instant coffee powder 1 jar marshmallow cream and 1 container cool whip. Mix together and pour onto cooled cake. Drizzle with chocolate fudge sauce and then chill in the fridge for about 30 minutes before serving.

Mocha Glaze

1/2 cup white chocolate chips
1 bar bittersweet
1 bar semisweet chocolate 
1/4 cup strong coffee ( more or less  )

Melt everything together and let cool until thick. Pour spoonfuls over cupcakes or pour everything over the cake.

Mocha Frosting

2 cups powdered sugar
1/4 cup butter, softened
1 tsp vanilla
1/2 cup Cocoa
Strong Coffee

Beat sugar and cocoa with butter. Add vanilla. Beat until well combined. Slowly pour in coffee while continuing to mix the sugar. Add just enough to make the frosting fluffy.

Garnish as desired with sprinkles, chocolate curls, homemade whipping cream, hot fudge sauce ( just in case it isn't "fudge-y" enough for you:)


6/21/2012

~The Not So Fancy Family Pictures~


I posted a picture of my 3 kiddos on Facebook a couple weeks ago and laughed because getting a decent picture these days is far from easy....as you can see from these few we tried to take at Claira's 4th birthday party.....


Grant and I didn't even make it into the first few because Grant wasn't home from work yet and we were running out of time...so, I asked my wonderful mother-in law to take a few......


(Claira, Lighting, Will holding a golf ball, Charlotte looks startled and I could have used some lipstick)
Grant made it home and ran upstairs to shower and get ready for the party....I yelled  up the stairs (sweetly, of course), "Hurry up, I want to take a family picture...."


"Come on Honey, forget you had a bad day and smile...and, did you have to wear those tennis shoes?"
(I am not even going to mention that our clothes CLASH horribly!)


End of story...we never got a decent picture.

Moral of the story is take the pictures, even if your outfits don't match, the kids are cranky,  and the lighting is bad....the memories are precious. So, sisters....I will be looking for some family pictures, soooooon!!

~Rhiannon~

DIY Flower Headband ~ tutorial ~

I love flower headbands for my little girl. I usually buy them from Etsy but decided to make a few of my own after finding all the supplies at Hobby Lobby.


 I had the flowers at home so I only needed the headbands ( these soft stretchy ones are my favorite, they seem to be the most comfortable ) and the little studs for the centers. The white petals I had formed into a flower a while back but had taken it apart before I remembered to take a picture.


I pulled the pink flower a part and hot glued it to the bottom of the largest white petal. You can't really see that petal but it helps it look a little fuller. 


I placed 3 smaller petals in the center and then put another little clump of the pink in the middle of those then topped it with the little stud.


Glued the headband to the bottom of the flower and then I covered it with another petal so it would look finished.


This was the end result. So cute and girly!

isn't she the cutest!!

Lyla wanted to model it for you in her pj's:)

check out my new headband!
she definitely makes it look cuter:)


Have a great Thursday:)

Mary Elizabeth

6/20/2012

June's Free Book


Have you heard of Dolly Partons Imagination Library? She set up this organization to ensure that every preschooerl in her county had books. It then grew to be nationwide. I signed the kids up and we recieve free books every month. There has only been a couple of books that I wouldn't have picked out. So, if you haven't   heard of this program here's the link. Check it out and sign your children up.


This was the book we received for June.

Christine

6/17/2012

Friday's Treat

So this week I made something savory rather than sweet due to an "overwhelming" request as my husband put it..... SLOPPY JOE'S;) Yes, I made the office lunch instead of just a treat. They were a big hit. There was nothing left in the crock pot when my husband got home from work, which is what I aim for! I have had this 'recipe' for several years and they are always a big hit anywhere I take them.  I actually don't have an exact recipe for them. It is basically ground beef in a sweet barbecue sauce. That's the best way I can describe it.I didn't get to take any pictures.....sorry about that. It was a hectic Thursday, the joe's were cooking in the crock pot during the night while I was sleeping and I just didn't get the pictures.


So. since I don't have much for you on the food subject I thought I would share a few pictures of my daughter. That's a treat, right? She turned 7 months this week!!! WOW! I can't even believe she is 7 months old already. Growing like a weed and changing every day.


couldn't be more fun

7 months old today:)

love this little girl, chubby arms,  legs and all!!
That's better than food pictures anyways, isn't it? I know I am probably the only one partial enough to think that!:)

I hope ya'll are having a great weekend and enjoying your Fathers Day!

Mary Elizabeth

6/15/2012

"New" Chair

I am ashamed to say that I bought this chair last year at the thrift store. One reason that it took so long to redo it was that I wasn't sure what I wanted to do with it. This week I finally decided to paint it and recover the seat. I really like how it turned out. My decor (if you will) since my teenage years has always been brown, tan, and a little dark blue or burgundy thrown in depending on the year. Frankly, I was so tired of it but couldn't find anything else I liked. I really like the clean, fresh look of modern decor. Unfortunately, that look would not go with my house. So, I am trying to incorporate it in where I can. That's were the color and look of this chair is supposed to take me. I think it works. I only took one before picture. The seat was covered in a cream and burgundy print material.
the before

the after
 The chair is painted in Exotic Sea from Valspar gloss spray paint and the seat is covered in white leather from Jo-Ann's. I picked the leather because hopefully it will be easy to clean.


I also made the canvas hanging above it. I pulled the colors from the curtains hanging in the dining room. The inspiration came from a canvas I saw on a blog. The chair probably won't stay there for long, but for right now it works.

Christine

6/11/2012

Pizza!

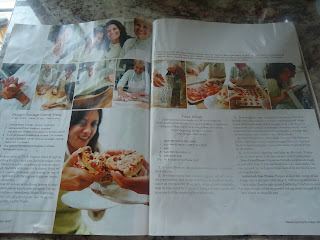
Growing up we made pizza all the time. Now that means the dough and sauce were made from scratch. My Mom would have had us make the cheese too, except we didn't have cows. So, that was bought. We used several different recipes over the years. But, I think the one I am about to share is the best one I've used. I bought this magazine a couple years ago at an airport (can't remember where) flying back to Alaska from North Carolina. That was in the stress free flying days when I could take a book or magazine and read it while flying though the air. These days, not so much. The whole time is spent telling the kids not to kick the seat in front of them, and PLEASE for the hundred time quick touching everything, it's nasty. I was informed though that if it doesn't look nasty it's okay. It has to look nasty to be nasty. So, to my boys germs aren't nasty. Glad we settled that discussion.
Back to the pizza recipe, it comes from Simply Perfect Italian magazine. The article was so cute. This was a 100 year old family recipe that even now was requested at all family gatherings. This recipe calls for an egg which adds richness and several risings that result in a lighter, tastier crust. This really is the best crust recipe. It looks like a lot of steps, but it is really rather simple and so worth the little bit of effort involved.


Pizza Dough:

In a small bowl,  stir 1 package of yeast and 1 cup or warm water. Let it stand for 5 minutes.


In a large mixing bowl, combine 1 egg, 3 tablespoons of olive oil and 1/4 teaspoon of salt. Stir in the yeast mixture. Add 1 1/4 cup of flour. Beat with  an electric mixer on low speed for 30 seconds, scraping bowl constantly. Beat on high speed for 3 minutes. Using a wooden spoon, stir in as much of the remaining flour as you can (total flour is 3 1/2 to 4 cups).


Turn dough out onto a lightly floured surface. Knead in enough of the remaining flour to make a moderately stiff dough that is smooth and elastic (6-8 minutes). Lightly grease a large bowl; place dough in bowl and cover with a damp towel (make sure it doesn't touch the dough). Let it rise for 30 minutes.


Punch dough down. Turn dough out onto a lightly floured surface. Roll into the shape of the pan you are using. Place onto the grease pan. Cover with damp towel and let rise for 20 minutes.

Spread oregano over the dough, then sauce. Sprinkle with mozzarella cheese. Break off small chunks of sausage and arrange on top of the cheese. Sprinkle with parmigiano-reggiano cheese. Drizzle olive oil over the top.

Bake for 30 minutes or until crust  bottom is crisp and brown. Cool for 5 minutes.

Let me know if you make this and how you like it.


Rhiannon loves it, but prefers it on the table not on the plate.


Christine

6/08/2012

Friday's Treat


Peanut Butter Chocolate Chip Cookies were on the list for this week's treat. I love these cookies. Of course anything with peanut butter and chocolate is awesome! I found the recipe for these on Smitten Kitchen. They are very yummy;) As she says on her website she found the recipe for these in the Magnolia Bakery cookbook ( a popular bakery in New York City ). 


These come together so easily that I actually mixed them up by hand. Yep, that's right....by hand! Mix them up and scoop them out ( I used a large cookie scoop for this or you could use an ice cream scoop as well ).


Roll them in a little bit of sugar and then place on your baking sheet.


I pressed them down with a fork, which is traditional for peanut butter cookies and then bake


These are large. If you wanted a smaller cookie just use a smaller scoop or spoon.

Have a great weekend and enjoy!!

Mary Elizabeth


6/07/2012

Garlic-Slathered Stretch Bread

A few years ago I randomly got a cookbook in the mail. Not sure how it came about that I received it. I didn't order it and had never heard of it before, A Passion for Baking.  I don't usually use cookbooks ( Google is my cookbook! ) so I wasn't terribly excited about it until I started to look through it......BEST. COOKBOOK.EVER!!!


I have found some of the greatest baking recipes in this book. Everything from this garlic bread to amazing cookies and cakes of every kind. It also gives tips and tricks on the best way to mix, bake and store everything that's in it as well.

So, the Garlic Slathered Stretch Bread. This is pretty simple to make and is absolutely amazing.


The dough is light and fluffy.


The topping is not too strong and just melts into the bread.


Combine the two and then top it with plenty of mozzarella cheese.


And this is what you get at the end. Cut it into strips and enjoy!!! I usually make this with pasta or soup and sometimes we just eat this!

Garlic-Slathered Stretch Bread Recipe

Dough
2 cups warm water
1 3/4 tsp rapid rise yeast ( I have used regular yeast and that works just fine )
1 3/4 tsp salt
4 tsp sugar
4 cups flour

Whisk yeast and water together and let stand about 3 minutes. Add salt, sugar and most of the flour to make a soft dough. Knead for about 8 minutes, adding more flour if necessary. Let rise 1 1/2 to 3 hours. Turn dough onto floured surface and gently deflate. Let rest while you make the topping.

Garlic-Slather Topping
6 cloves garlic, finely minced
1/2 tsp salt
2/3 cup mayonnaise
1 cup grated parmesan cheese
1/2 tsp italian seasoning
1/3 cup olive oil
2 cups shredded mozzarella cheese

Mix everything but the mozzarella cheese together. Divide dough into half and stretch each half into a baking sheet. Spread half of filling onto each one and then top each one with 1 cup of mozzarella cheese ( I usually use more than that ).  Cover loosely and let rise another 1-1 1/2 hours. ( I have skipped this second rising when I was in a hurry and it turns out fine just not quite as light ). Bake at 400 for about 20-25 minutes until topping is brown and sizzling.

Enjoy!!

Mary Elizabeth


LinkWithin

Related Posts Plugin for WordPress, Blogger... Follow Me on Pinterest